Lemon yoghurt cake

A low-fat take on a lemon sponge. My own invention, tweaking a Mary Berry sponge recipe, after needing to use up lots of yoghurt that was going out of date.

You’ll need a 20-cm round cake tin, greased and lined with baking/greaseproof paper.


Ingredients:

300 g caster sugar

50 g butter, at room temperature

3 large free-range eggs (separated)

175 g 0% low-fat Greek yoghurt

50 g lemon-flavoured yoghurt

Zest of 1 lemon (+ some freshly squeezed juice for the icing if using)

175 g self-raising flour


Instructions

  1. Preheat the oven to 170ºC fan.
  2. Using an electric mixer (I use a K-mix), beat together the sugar, butter and egg yolks. Add all the yoghurt and lemon zest, beating until smooth.
  3. Fold in the flour using a metal spoon.
  4. Whisk the egg whites until they form soft peaks (takes less than 1 min). Carefully fold the egg whites into the batter, using a metal spoon.
  5. Pour into the prepared tin and bake for about 40 mins (check it at 30 mins). It’s ready when a skewer inserted into the middle of it comes out clean.
  6. Leave to cool in the tin for about 5 mins before turning out onto a wire rack to cool completely.
  7. While the cake is cooling, make the icing by mixing together 100 g sifted icing sugar and 1 1/2 tbsp lemon juice. Pour over the cold cake and smooth over. Leave for about half an hour to set.
Baked oatcakes

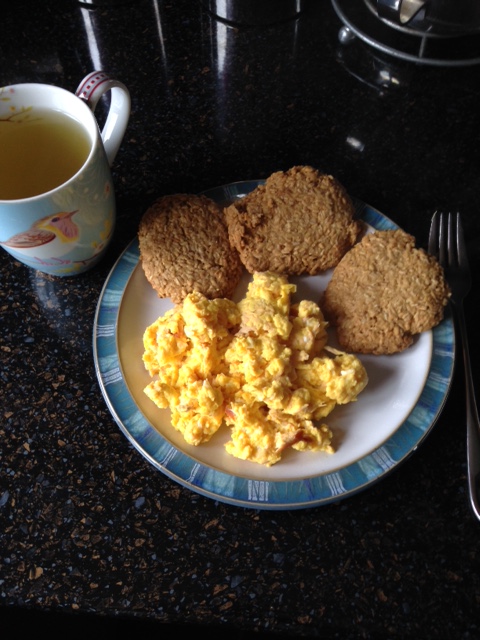
An egg-free recipe for days when egg supply is short.

This recipe will make about 12 medium-sized oatcakes.

IMG_4232.JPG

Ingredients:

2 cups oatmeal

1/2 cup plain flour

1/2 tsp bicarbonate of soda

1/2 tsp cream of tartar

2 1/2 tsp demerara sugar

4 oz unsalted butter

Splash cold water

Instructions

  1. Preheat the oven to 160ºC (fan) and line two baking sheets with baking/greaseproof paper.
  2. Place all the ingredients, except the water, in a bowl and mix together by rubbing in the butter with your hands.
  3. Once the butter has been rubbed in, add a splash of cold water – enough to make a soft dough.
  4. Dust your work surface with flour and roll out the dough to a thickness of about 0.5–1 cm (the thicker they are, the longer they’ll take to bake). Use a round cutter to cut out your oatcakes,* and place them on the baking sheets, spaced a bit apart (six to a sheet is enough).
  5. Bake for 40–45 mins, or a bit longer if you prefer them very crispy.IMG_4232.JPG

*If using rough oatmeal, you may find it’s easier just to shape by hand rather than using a cutter, as seen in the photo.

Lemon, ricotta and cranberry drops

This recipe is based on a Hummingbird Bakery one in their Home Sweet Home book. My own take on it is the addition of cranberries, which compliment the lemon flavour. I also tweaked the method a bit.

Not a cookie, not a biscuit; they are more like sponge drops and great with a cup of afternoon tea. There’s no need to be precise with the icing of them – just dollop it on.

Before you begin, you’ll need to line three baking sheets with greaseproof/baking paper and preheat your oven to 160ºC (fan).

Ingredients

For the drops:

210 g plain flour

1/2 tsp baking powder

1/2 tsp salt

60 g unsalted butter, at room temperature

200 g caster sugar

1 large, free-range egg

100 g ricotta

1 1/2 tbsp freshly squeezed lemon juice

100 g dried cranberries

Grated zest of 1 lemon


For the icing:

120 g icing sugar, sifted

1 1/2 tbsp freshly squeezed lemon juice

Grated zest of 1 lemon


Instructions:

  1. Using an electric mixer, beat together the butter and sugar until light and fluffy (about 5 mins).
  2. Add the egg, scraping down the sides of the bowl to ensure a good mixture.
  3. In a separate bowl, sieve together the flour, baking powder and salt and add to the creamed mixture in two batches, scraping down the sides of the bowl in between additions.
  4. Add the ricotta, lemon juice and zest, and mix until well incorporated.
  5. Finally, stir in the cranberries with a wooden spoon until as evenly distributed as possible.
  6. Using a generous dessertspoon-full, dollop the mixture onto the baking trays, making about 18 cakes. The mixture won’t be as thick as a regular cookie dough but should still hold its shape.
  7. Bake for 15 mins – they should be golden brown in colour. Don’t overbake or they will be very dry.
  8. Remove from the oven and allow to cool on the trays for at least 5 mins. They can then be transferred to a wire rack to cool completely before decorating.
  9. While the drops are cooling, make the glaze by putting the icing sugar, lemon juice and lemon zest into a medium-sized glass bowl and mix together with an electric mixer until smooth. When the drops are cool, dollop about 1/2 tsp of the glaze onto each, spreading it over the tops with the back of a spoon. Allow to set before eating.

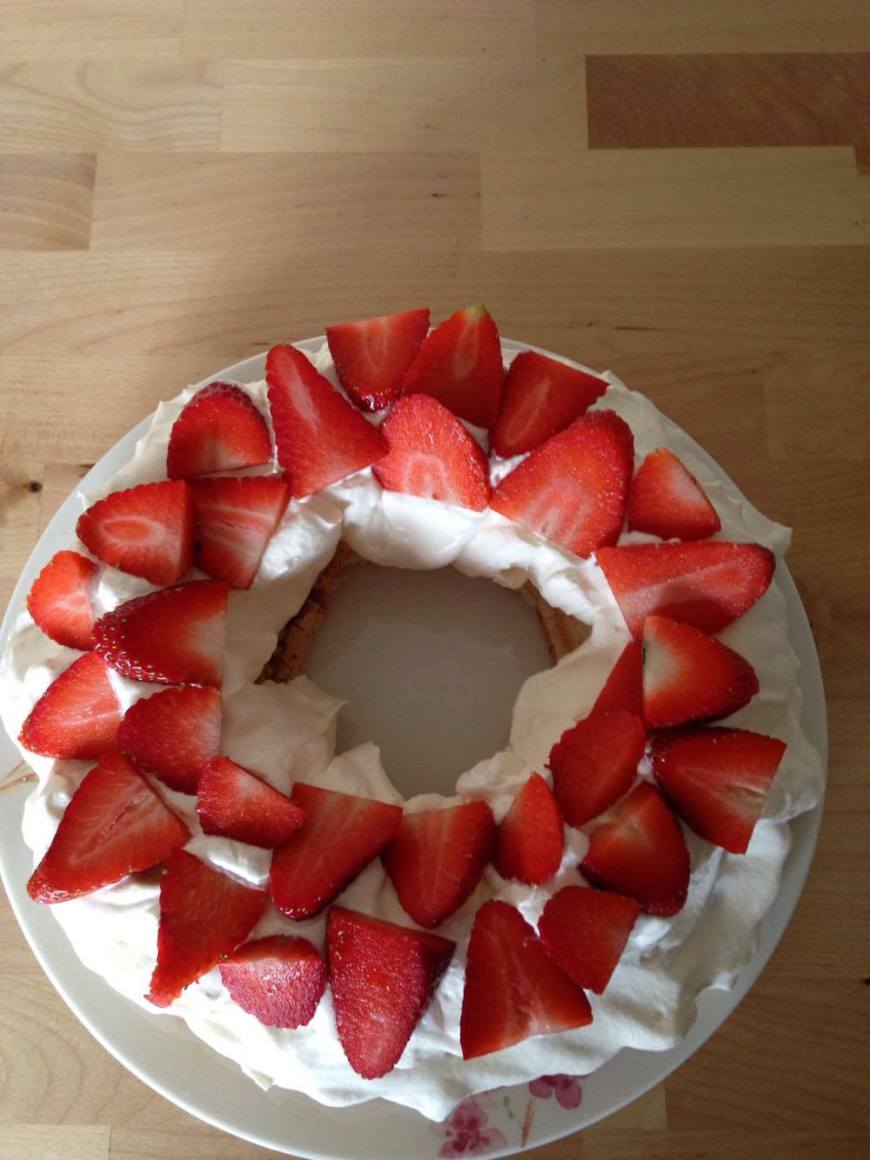
Strawberry and cream angel food cake

After making key lime pie again at the weekend, I had eight egg whites left over. As I wasn’t in the mood for meringues, a quick Google search for cakes using only egg whites brought me to angel (food) cake. I adapted the recipe for use with eight small egg whites and added the finishing touches of strawberries and cream myself.

Very light in texture, the sponge is almost fat-free, so if you’re watching what you’re eating, I would suggest leaving off the cream and having the sponge with fruit only.

Angel cake is traditionally baked in a ring-shaped tin but I don’t see any reason why it couldn’t be baked in a regular, 8-inch round pan.

13016795_10156724474570212_1661639110_o.jpg

Ingredients:

115 g plain flour

85 g icing sugar

8 egg whites, at room temperature

150 g caster sugar

Pinch of salt

1 tsp cream of tartar

1 tsp vanilla extract

300 g whipping cream

Handful of strawberries (or whatever fruit you have in the fridge)


Instructions

  1. Lightly grease whatever non-stick pan you are going to use and preheat the oven to 170ºC fan.
  2. Sieve the flour and icing sugar together into a bowl and set aside.
  3. Using an electric mixer, beat the egg whites until quite frothy. Add the caster sugar, salt, cream of tartar and vanilla extract, and continue beating the mixture until it forms stiff peaks (should almost look like a meringue mixture when it’s ready).
  4. Add the flour/icing sugar mixture to the beaten egg white mixture and, using a metal spoon, carefully fold in the dry ingredients until well incorporated.
  5. Spoon the cake mixture into the tin carefully, to avoid losing too much air from the batter.
  6. Bake for 30–35 mins, or until a skewer inserted into the middle of the cake comes out clean. Remove the cake from the oven and set the tin on a wire rack. Leave the cake to cool for a while in the tin before removing it from the tin and setting it to cool completely on the rack.
  7. To serve, beat the cream until it forms peaks, and spoon it over the top of the cake. Finely chop the strawberries and arrange on top of the cream in an attractive manner.

Sour cream blueberry muffins

These are muffins were a happy accident. I had a notion for blueberry muffins a couple of weeks ago and was just going to follow the Hummingbird Bakery’s recipe. However, when I got to the supermarket there was no buttermilk, so I wondered about making them with sour cream instead. Turns out, they were amazing! I’ll be making them my own way from now on.

The mix turned out quite thick, making it easy to work with, and it makes about 24 good-sized muffins. You could, therefore, halve the quantities given here to make a batch of 12 or, alternatively, make the full batch and freeze half of them (I tried and they freeze well).

You’ll need two 12-hole muffin tins, lined with paper cases.


Ingredients:

360 g plain flour

370 g caster sugar

1 tsp salt

1 1/2 tsp baking powder

1/2 tsp bicarbonate of soda

375 ml sour cream

1 egg (free range, of course!)

1/2 tsp vanilla extract

70 g unsalted butter, melted

200 g blueberries


Instructions

  1. Preheat the oven to 170ºC fan.
  2. Sieve together the flour, sugar, salt, baking powder and bicarbonate of soda into bowl. Beat together with an electric mixer on slow speed.
  3. Put the sour cream, egg and vanilla into a jug and mix with a fork to combine.
  4. Slowly pour the sour cream mixture into the flour mixture, with the mixer still on a slow speed. Beat until incorporated.
  5. Pour in the melted butter and beat until the butter has just been incorporated. Turn the speed of the mixer up to medium and continue to beat the mixture until it is smooth (a couple of minutes at most).
  6. Turn off the mixer and fold the blueberries into the muffin mix, using a wooden spoon.
  7. Spoon the mixture into the paper cases until they are no more than two-thirds full. Any more than this and the mix is likely to spill over the top during baking. Bake for 25 mins, until golden brown or until a skewer inserted into the middle of a muffin comes out clean.
  8. Remove from the oven but leave the muffins in the tin to cool slightly (about 5 mins) before transferring to a wire rack to cool completely.

Key lime pie

Key lime pie, in all its various guises, is possibly my favourite dessert of all time. As with cheesecakes and other similar puds, I don’t favour a thick biscuit base. Therefore, I adapted the Hummingbird Bakery’s recipe to suit my own tastes. If you prefer a thicker, authentic American-style pie case, check out the original in the Bakery’s cookbook.

If you use free-range eggs, like I do, you will probably find that your filling takes on more of yellow colour than a green one, as no artificial lime colouring is used in this recipe. Also, 8 egg yolks are required so you may wish to consider what to make with the leftover egg whites. Have a look at some meringue recipes (check out my white chocolate-dipped sticky toffee meringues) or make a couple of egg white omelettes for your lunch!

This is very easy to make. Make the base and cook the filling the day before, refrigerate overnight and then add the cream on the morning of they day you are going to eat it.


You’ll need a greased, 9-inch, loose-bottomed, non-stick tin.


Ingredients:

For the base

250 g digestives

100 g unsalted butter, melted


For the filling

8 egg yolks

2 x 397-g tins of condensed milk

juice and zest of 5 limes (leave a wee bit of zest to decorate)

450 ml whipping cream


Instructions

  1. Start by making the base. Preheat the oven to 170ºC fan. Blitz the digestives in a food processor until finely ground. Slowly trickle in the melted butter with the food processor on. Once it is well mixed, tipped the mixture out into the tin and then press it down with the back of a spoon. Bake it for 20 mins and then set aside to cool completely.
  2. Turn the oven down to 150ºC. While the base is cooling, make the filling. Place the eggs yolks, condensed milk, lime juice and lime zest into a glass bowl and mix gently with with a hand-held balloon whisk. It doesn’t take much – it will thicken quickly.
  3. Pour the filling onto the cooled base and bake for 20 mins or until the filling is firm to the touch but very slightly soft in the middle. Leave it to cool completely and then put it in the fridge for a good few hours.
  4. When ready to eat, whisk the cream until soft peaks form and spread it over the top of the pie, making a nice mound of fluffy cream. Decorate with some left over lime zest.

Malty chocolate slab cake

Yes, I am aware, another malty chocolate concoction! However, I think this is the easiest, and possibly the best, yet. This may trump my earlier recipes (although the Malteser muffins are still ace). This latest effort started off by me ripping out a recipe from a magazine I was reading at the hairdresser. I was halfway through making it when I realised I only had half the recipe! After fruitless attempts to find the original online, I had to just wing it, and I’m pleased to say, it turned out fab! Although the original recipe stated 100 g milk chocolate for the cake covering, that definitely wasn’t enough, so I’ve doubled the quantities accordingly. I also like that there’s no icing sugar in the topping.

I baked this in a rectangular tin that was about 30 x 20 cm. Anything roughly that shape and size will do, although if you go for a smaller but deeper tin you will need to adjust the baking time accordingly. Remember to grease and line your tin with baking paper.

Ingredients:

For the sponge
60 g Horlicks or Ovaltine

50 g cocoa powder

225 ml milk

175 g unsalted butter, at room temperature

125 g caster sugar

125 g light brown muscovado sugar

3 medium-sized free-range eggs, beaten with a fork

185 g self-raising flour

For the topping

200 g milk chocolate

40 g unsalted butter, at room temperature

Medium-sized bag of Maltesers

Instructions

  1. Put the Horlicks/Ovaltine and the cocoa powder in a non-stick, medium-sized pan and stir in the milk with a wooden spoon until combined. Set the pan over a very low heat and stir continuously until the mixture comes to the boil and thickens slightly (this took about 20 mins when I did it).
  2. Remove the pan from the heat and leave to cool until barely warm (about 30 mins). At this point you can start preheating your oven to 170ºC fan.
  3. Next, beat together the butter and the sugars until light and fluffy. I use an electric K-mix for beating but any hand-mixer will do.
  4. Gradually add the eggs to the mixture (I did four additions), scraping down the sides of the bowl now and again to ensure the mixture is well combined.
  5. Sift half the flour into the bowl and beat until combined. Now add half of the chocolate/milk mixture and beat until combined. Finish by adding the rest of the flour, beating until combined, and finishing with the second lot of the chocolate mix.
  6. Pour the cake mixture into the tin, levelling it off if necessary and ensuring the mixture reaches all the corners of the tin.
  7. Bake for 25 mins. The cake is ready when a skewer inserted into the middle of it comes out clean. Leave the cake to cool in the tin for a few minutes, before turning it out onto a wire rack to cool completely before adding the topping.
  8. To make the chocolate topping, melt the milk chocolate in a bowl set over a pan of simmering water, ensuring the water does not touch the bottom of the bowl. When the chocolate has melted beat in the butter until the mixture thickens a bit. Spread over the cake and then add some Maltesers for decoration. I just left mine whole but you could crush them and scatter them all over the top if you wished.

Chocolate cheesecake muffins

These are contenders for my favourite ever cupcakes. A mix of a chocolate muffin mix and vanilla cheesecake, these are melt in the mouth. Just as tasty with or without the icing. Oh, and don’t despair. The mixtures for both look a bit odd, but just roll with it – they’ll turn out perfectly.

You’ll need one 12-hole muffin tin, lined with paper cases.

IMG_1245

Ingredients:

For the muffin mix

190 g plain flour

120 g caster sugar

40 g cocoa powder

1/2 tsp bicarbonate of soda

125 ml water

40 ml sunflower/vegetable/rapeseed oil

1 1/2 tsp white wine vinegar

1/2 tsp vanilla extract

For the cheesecake mix

140 g Philadelphia cream cheese (full fat)

60 g caster sugar

1 egg (free range, of course!)

1/2 tsp vanilla extract

Pinch of salt

100 g milk chocolate chips

Instructions

1. Preheat the oven to 170ºC fan.

2. Start by making the chocolate muffin mix. Sieve the flour, sugar, cocoa powder and bicarbonate into a large bowl.

3. Put the water, oil, vinegar and vanilla extract into a jug, whisking with a fork to combine. With an electric whisk to hand, start pouring the wet ingredients into the dry ingredients, mixing continuously with the whisk, increasing the speed as the mixture thickens. Once well mixed, spoon the muffin mixture into the paper cases. There should be enough mixture to get the cases two-thirds full.

4. Next, make the cheesecake mix. Beat together the Philadelphia cheese, sugar, egg, vanilla extract and salt on a medium speed until smooth. I used my K-mix electric mixer for this but a handheld electric whisk could also be used. Using a wooden spoon, stir the in the chocolate chips.

5. Spoon the cheesecake mixture over the top of the muffin mixture in the cases.

6. Bake in the oven for 20 mins. The cheesecake on the top should be a light golden colour. It’s important not to overbake as the mixture will become very dry. Leave to cool for a while in the tins before transferring to a wire rack to cool completely.

7. When cold, you may wish to add some icing. A recipe for a cream cheese topping is given below. Top the cakes with the icing and then dust with cocoa powder for some added razzle dazzle.

Cream cheese topping

Sift 300 g icing sugar into a bowl and add 50 g softened unsalted butter. Beat together until the mixture combines a bit. Then add 125 g cold Philadelphia cheese and beat the mixture for 5 mins at a high speed to get it nice and fluffy.

Ginger cake

So this is a recipe for a rather large ginger cake, not a ginger bread. Whether you bother with the topping or not is entirely up to you. It’s just as good with or without it.

You will need a 9″/23 cm round tin.

Ingredients:

For the cake

200 g butter

200 g dark muscovado sugar

100 g black treacle

100 g golden syrup

2 large eggs (free range, of course), beaten

300 ml milk

350 g plain flour

2 tsp ground ginger

2 tsp bicarbonate of soda

Two balls of stem ginger, chopped as finely as possible

For the topping

85 g butter

175 ml double cream

175 g caster sugar

Instructions

1. Heat your oven to 140ºC fan and prepare the tin by greasing it with butter and then lining with greaseproof or baking paper.

2. Put the butter, sugar, treacle and syrup in a large pan over a low heat. Stir until the butter has melted and the mixture is smooth. Remove from the heat and set aside to cool for 10 mins.

3. Meanwhile, sift the flour, ginger and bicarbonate together in a bowl.

4. Stir the eggs and milk into the butter, sugar, treacle and syrup mixture, mixing well. Then, add in the dry ingredients and mix until there are no more lumps. Pour into the tin and bake for 55 mins. Check that it’s ready by inserting a skewer into the centre of the cake. If the skewer comes out clean, the cake is ready.

5. Cool the cake in the tin for about 15 mins and then transfer it to a wire rack to cool completely, removing the baking paper from the sides and bottom of the cake.

6. To make the topping, put all the ingredients into a medium-sized pan set over a medium heat. Stir until the butter has melted and the mixture is smooth. Increase the heat and boil hard for 4 mins, stirring occasionally. It should look like runny custard. Pour the mixture into a bowl and leave to cool for at least 30 mins.

7. Beat the mixture with an electric whisk until it is thick enough to spread over the cake.

8. Spread the topping over the cake and top with a few small bits of crystallised ginger if you have any to hand.

White chocolate custardy biscuits

I love a custard biscuit. Add white chocolate chips and it’s taken to the next level. So easy to make a batch of these and have them out of the oven within 30 mins.

Makes about 20 depending on how big you shape the dough.

Ingredients:

140 g unsalted butter, at room temperature

175 g caster sugar

1 egg, free range of course!

1/2 tsp vanilla extract

225 g self-raising flour

85 g custard powder

100 g white chocolate chips

Instructions

1. Line three baking sheets with baking/greaseproof paper and preheat the oven to 160ºC fan.

2. Beat together the butter and caster sugar with an electric mixer.

3. Add in the egg, scraping down the sides of the bowl, and then the vanilla extract. Beat on a moderate speed until mixed.

4. Meanwhile, sieve together the flour and custard powder in a separate bowl. Add to the butter, egg and sugar mixture in two batches, beating until just incorporated.

5. Stir in the chocolate chips with a wooden spoon, mixing until they are quite evenly distributed.

6. Roll the dough into balls, about a dessert spoon’s worth, placing about six on each baking sheet. Press the dough down lightly with your fingertips. Bake in the oven for 14 mins, until light golden brown on the top. Leave to cool for a couple of minutes on the sheets and then transfer to wire racks to cool completely.